Ubuntu 18.04 で運用しているサーバーに、プロジェクト管理ツール、Redmine をインストールしたのでその覚書です。
「RubyとRuby on RailsをRbenvでインストール(システムワイド編) 」の続きになります。
この記事を書いてずいぶん寝かしてしまっていたので、以下の記述は Redmine 4.0.1 に関するインストールになります1。
なお、いつものことですが、この記事はあくまでも個人の備忘録ですので、参考にされる場合は自己責任でお願いします。

これまで、Redmine 3.2 を利用していたのですが、サーバー移行するのでバージョンアップしてみました。
記事は、原則として新規にインストールすることを前提として書いていますが、後半に移行時のヒントを書いています。
前提
- OS は Ubuntu18.04 。
- Ruby がインストール済み (RubyとRuby on RailsをRbenvでインストール(システムワイド編)
- Apache2 がインストール済み (Ubuntu 18.04 + LAMP 環境構築 (2) – Apache 2.4)
- MariaDB がインストール済み (Ubuntu 18.04 + LAMP 環境構築 (3) – MariaDB 10.3)
公式のインストールガイド
データベースの作成
MariaDB でデータベースを作成します。
$ mysql -u root -p次のSQLを実行します。ここでは仮に以下のように想定して設定します^2。
- データベース名:
redmine - ユーザー名:
redmine - パスワード:
my_password
CREATE DATABASE redmine CHARACTER SET utf8mb4;
CREATE USER 'redmine'@'localhost' IDENTIFIED BY 'my_password';
GRANT ALL PRIVILEGES ON redmine.* TO 'redmine'@'localhost' WITH GRANT OPTION;
Redmineの取得
Redmine をダウンロードします。
$ wget http://www.redmine.org/releases/redmine-4.0.1.tar.gzデータベース接続設定
Redmine のアーカイブを解凍して、データベースの設定ファイルconfig/database.ymlを編集します。
$ tar zxf redmine-4.0.1.tar.gz
$ cd redmine-4.0.1/
redmine-4.0.1$ cp config/database.yml.example config/database.ymlconfig/database.ymlに接続設定を記述します。。
# config/database.yml
production:
  adapter: mysql2
  database: redmine
  host: localhost
  username: redmine
  password: "my_password"
追加Gemのインストール
実行に必要な Gem をインストールするのに必要なパッケージをインストールします。
redmine-4.0.1$ sudo apt install imagemagick libmagick++-dev fonts-takao-gothicbundle install を実行して、必要なGemをインストールします。
redmine-4.0.1$ bundle install --without development test
The dependency tzinfo-data (>= 0) will be unused by any of the platforms Bundler is installing for. Bundler is installing for ruby but the dependency is only for x86-mingw32, x64-mingw32, x86-mswin32. To add those platforms to the bundle, run `bundle lock --add-platform x86-mingw32 x64-mingw32 x86-mswin32`.
:
:
Bundle complete! 26 Gemfile dependencies, 58 gems now installed.
Gems in the groups development and test were not installed.
Use `bundle info [gemname]` to see where a bundled gem is installed.
rmagickが不要の場合は、単純に以下のコマンドでOK
redmine-4.0.1$ bundle install --without development test rmagickセッショントークンの作成
redmine-4.0.1$ bundle exec rake generate_secret_tokenデータベーススキーマオブジェクトの生成
redmine-4.0.1$ RAILS_ENV=production bundle exec rake db:migrate
== 1 Setup: migrating =========================================================
-- adapter_name()
   -> 0.0000s
-- adapter_name()
   -> 0.0000s
-- adapter_name()
   -> 0.0000s
-- create_table("attachments", {:options=>"ENGINE=InnoDB", :force=>true, :id=>:integer})
   -> 0.0458s
   :
   :
== 20180923091603 ChangeSqliteBooleansDefault: migrating ======================
== 20180923091603 ChangeSqliteBooleansDefault: migrated (0.0000s) =============
データベースデフォルトデータセットの挿入
Select language: で言語を設定します。ja に設定します。
redmine-4.0.1$ RAILS_ENV=production bundle exec rake redmine:load_default_data

Select language: ar, az, bg, bs, ca, cs, da, de, el, en, en-GB, es, es-PA, et, eu, fa, fi, fr, gl, he, hr, hu, id, it, ja, ko, lt, lv, mk, mn, nl, no, pl, pt, pt-BR, ro, ru, sk, sl, sq, sr, sr-YU, sv, th, tr, uk, vi, zh, zh-TW [en] ja
====================================
Default configuration data loaded.
必要なディレクトリを作成
必要なディレクトリを作成します。
redmine-4.0.1$ mkdir -p tmp tmp/pdf public/plugin_assets
redmine-4.0.1$ chmod -R 755 files log tmp public/plugin_assetsもし、環境移行等で、バックアップファイルから復元する場合は、log、tmp、 public/plugin_assetsのディレクトリにあるファイルの実行権限を無効にします。
redmine-4.0.1$ sudo find files log tmp public/plugin_assets -type f -exec chmod -x {} +インストールをテスト
WEBRic2 を利用して、試験的にインストールをテストしてみます。
redmine-4.0.1$ sudo su
redmine-4.0.1# source /etc/profile
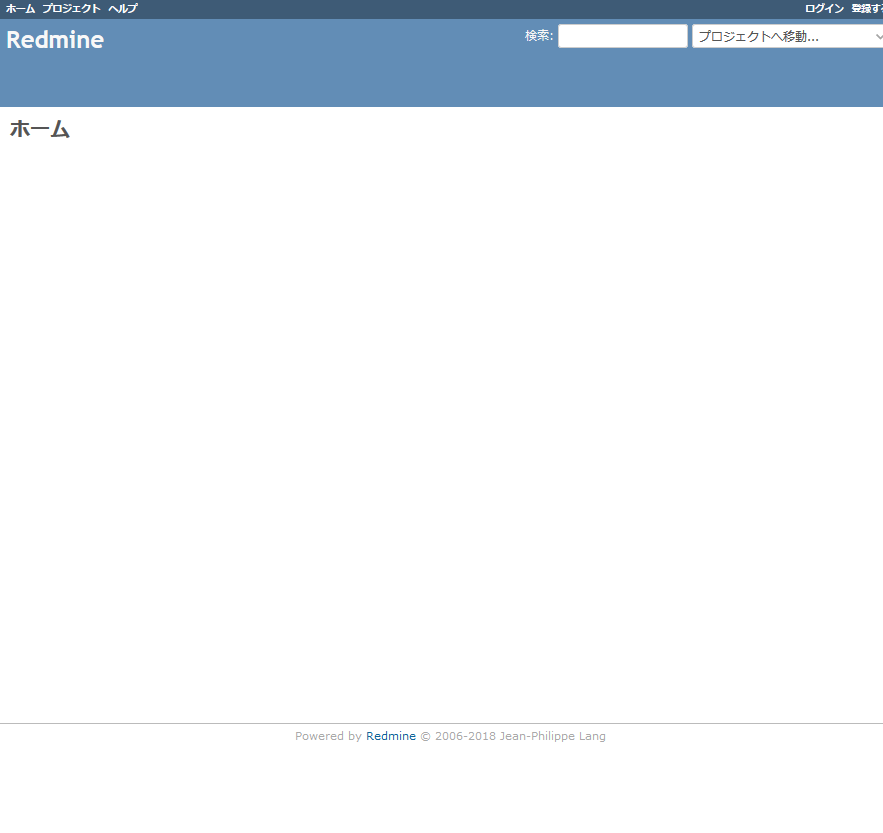
redmine-4.0.1# bundle exec rails server webrick -e productionhttp://your-ip-address:3000/ にアクセスして Welcome ページが表示されるか確認。
確認が取れたら、CTRL+C で停止させます。
passenger インストール
Apache2 上で Ruby の Webアプリケーションを実行させるために、Passenger をインストールします。
$ sudo -i gem install passenger --no-document
Fetching passenger-6.0.1.gem
Building native extensions. This could take a while...
Successfully installed passenger-6.0.1
1 gem installed
Passenger のビルドに必要なパッケージを導入します。
$ sudo apt install libcurl4-openssl-dev apache2-dev libapr1-dev libaprutil1-devPassenger をインストールします。
$ sudo -i passenger-install-apache2-module実行すると、何点か質疑があるのでそれに答えます。
最初の問には、1. The Apache2 module will be installed for you. を選択します。
Welcome to the Phusion Passenger Apache 2 module installer, v6.0.1.

This installer will guide you through the entire installation process. It
shouldn't take more than 3 minutes in total.

Here's what you can expect from the installation process:

 1. The Apache 2 module will be installed for you.
 2. You'll learn how to configure Apache.
 3. You'll learn how to deploy a Ruby on Rails application.

Don't worry if anything goes wrong. This installer will advise you on how to
solve any problems.

Press Enter to continue, or Ctrl-C to abort.
1
言語は、Ruby を選択します。
Which languages are you interested in?

Use <space> to select.
If the menu doesn't display correctly, press '!'

 ? ?  Ruby
   ?  Python
   ?  Node.js
   ?  Meteor<enter>
その後、ビルドが始まるのでしばらく待ってください。
ビルドが終了すると、Apache2 向けの設定、LoadModule ~ </IfModule>が表示されるので、コピーします。これは後ほど/etc/apache2/conf-available/passenger.conf で設定します。
Almost there!

Please edit your Apache configuration file, and add these lines:

   LoadModule passenger_module /usr/local/rbenv/versions/2.6.1/lib/ruby/gems/2.6.0/gems/passenger-6.0.1/buildout/apache2/mod_passenger.so
   <IfModule mod_passenger.c>
     PassengerRoot /usr/local/rbenv/versions/2.6.1/lib/ruby/gems/2.6.0/gems/passenger-6.0.1
     PassengerDefaultRuby /usr/local/rbenv/versions/2.6.1/bin/ruby
   </IfModule>

After you restart Apache, you are ready to deploy any number of web
applications on Apache, with a minimum amount of configuration!

Press ENTER when you are done editing.

--------------------------------------------

Validating installation...

 * Checking whether this Passenger install is in PATH... ?
 * Checking whether there are no other Passenger installations... (!)

   You are currently validating against Phusion Passenger 6.0.1, located in:

     /usr/local/rbenv/versions/2.6.1/lib/ruby/gems/2.6.0/gems/passenger-6.0.1/bin/passenger

   Besides this Passenger installation, the following other
   Passenger installations have also been detected:

     /usr/local/rbenv/shims/passenger

   Please uninstall these other Passenger installations to avoid
   confusion or conflicts.

 * Checking whether Apache is installed... ?
 * Checking whether the Passenger module is correctly configured in Apache... (!)

   You did not specify 'LoadModule passenger_module' in any of your Apache
   configuration files. Please paste the configuration snippet that this
   installer printed earlier, into one of your Apache configuration files, such
   as /etc/apache2/apache2.conf.

Detected 0 error(s), 2 warning(s).
Press ENTER to continue.

--------------------------------------------

Deploying a web application

To learn how to deploy a web app on Passenger, please follow the deployment
guide:

  https://www.phusionpassenger.com/library/deploy/apache/deploy/

Enjoy Phusion Passenger, a product of PhusionR (www.phusion.nl) :-)
https://www.phusionpassenger.com

PassengerR is a registered trademark of Phusion Holding B.V.
redmine-4.0.1$
Redmine をデプロイ
ディレクトリごとファイルを移動。ここでは、/var/lib 配下に移動させます。
$ sudo mv redmine-4.0.1/ /var/libシンボリックリンクを張ります。
$ sudo ln -s /var/lib/redmine-4.0.1 /var/lib/redmineフォルダのオーナーとグループを変更します。
$ sudo chown -R www-data:www-data /var/lib/redmine-4.0.1/Apache2 の設定
passenger.conf
/etc/apache2/conf-available/passenger.conf を作成し、設定を有効にします。
LoadModule passenger_module /usr/local/lib/apache2/mod_passenger.so
<IfModule mod_passenger.c>
  PassengerRoot /usr/local/lib/gems/2.6.0/gems/passenger-6.0.1
  PassengerDefaultRuby /usr/local/bin/ruby
</IfModule>
$ sudo a2enconf passengerredmine.conf
/etc/apache2/sites-available/redmine.conf を作成し、サイトの設定を有効にします。
設定は、サイトURLのサブディレクトリ /redmine にRedmine を配置するようにしています。
Alias /redmine /var/lib/redmine/public
<Location /redmine>
    PassengerBaseURI /redmine
    PassengerAppRoot /var/lib/redmine
</Location>
<Directory /var/lib/redmine/public>
    Allow from all
    Options -MultiViews
    Require all granted
</Directory>
$ sudo a2ensite redmine/usr/local/rbenv 以下のオーナーの変更
残念ながら、/usr/local/rbenv 以下のディレクトリやファイルについて、オーナーが root 以外だと、The application process exited prematurely.というログを吐いて、redmineを起動できないので、オーナーを変更します。
$ sudo chown -R root /usr/local/rbenvRedmine のインストールを確認
Apache2 を再起動します。
$ sudo systemctl restart apache2その後、http://サイトURL/redmine にアクセスしてみて、Redmine のホームが表示されるかどうか確認します。
エラーが発生する場合は、/var/log/apache2/error.log を確認して対処してください。
ModSecurity を使用している場合
/etc/modsecurity/modsecurity_crs_99_whitelist.conf を作成し、次のように記述します。
<Directory /var/lib/redmine/>
    SecRuleRemoveById 932110 932130 949110 980130
</Directory>
保存したら、Apache2 を再起動します。
$ sudo systemctl restart apache2マイグレーションする場合のヒント
Redmine 3.2 から 4.0.3 にマイグレーションしたときのヒントです。
移す必要のある設定・データ
以下のファイルを、古い環境から新しい環境に移します。
config/database.ymlと、config/configuration.ymlfiles/以下のファイルplugins/と、public/themes/以下のファイル- データベースは、
sqldumpコマンドでバックアップを取得しておきます
必要なパッケージのインストール
もし、redmine-4.0.1を /var/lib にデプロイしている場合は、一旦アプリケーションのオーナーとグループを変更します。もし作業しているユーザーが user1 であるならば、
sudo chown -R user1:user1 /var/lib/redmine-4.0.1もし、デプロイ前で、作業ユーザのディレクトリにある場合は特にオーナーやグループを変更する必要はありません。
bundle install を実行し、Gem をインストールします。
bundle install --without development test※システムにImagemagichがインストールされていない場合は、
bundle install --without development test rmagickデータベース設定でアダプターを指定し直した場合は、忘れずに bundle install を再実行してパッケージを更新する必要があります。
Redmine で必須ではない Gem をインストールしたい(例えば、fcgiのような)場合、Redmineのルートディレクトリに、Gemfile.localというファイルを作って、そこに書いておくといいよ、とのこと。bundle installした時に自動的にロードされる。
セッションストア秘密鍵の作成
bundle exec rake generate_secret_tokenデータベースのマイグレーション
バックアップしていたデータベースを、新しい環境にリカバリした後、次のコマンドを順に実行して、データベースをマイグレーションします。
bundle exec rake db:migrate RAILS_ENV="production"bundle exec rake redmine:plugins:migrate RAILS_ENV="production"最後に、オーナー、グループを変更した場合は、もとに戻します。
sudo chown -R www-data:www-data /var/lib/redmine-4.0.1ユーザ権限のチェック
[管理] → [役割と権限] で、新機能の権限等をチェックし設定。
まとめ
なんだかグダグダです。
時間が立ってしまっているのもあり、記憶が曖昧な部分もあります。
可能な限り再検証していますが、どうでしょうか・・
また、Ruby の Webアプリケーション の環境構築等は初めてなので、あまり良くわからないままやっています。
Rbenv は便利そうですが、ここで書いた内容で正解なのかどうか、よくわかっていません。
とにかく、動くこと優先で記事を書いています。
ひとまず、平成最後の更新です。


0件のコメント